Markdown Tips to Write Faster Blog Posts
Write and format your blog posts faster with these Markdown shortcuts. Whether you’re a seasoned blogger or just getting started, mastering Markdown can dramatically streamline your content creation process. This guide covers everything from basic syntax to advanced techniques that will help you produce polished, professional blog posts in less time.
Why Markdown Is a Blogger’s Best Friend
Markdown lets you format text without lifting your hands from the keyboard. Created by John Gruber in 2004, this lightweight markup language has become the standard for content creation across platforms like GitHub, Reddit, Stack Overflow, and countless blogging platforms.
Here’s why bloggers love Markdown:
- Speed - Format as you write without touching the mouse
- Portability - Text files that work anywhere, future-proof your content
- Focus - Concentrate on writing, not formatting
- Consistency - Maintain uniform styling across all your posts
- Simplicity - Learn the basics in minutes, not hours
Essential Markdown Syntax for Bloggers
Headings
Structure is crucial for readability. Use hashtags for headings:
# Main Title (H1)
## Section Heading (H2)
### Subsection (H3)
#### Smaller Subsection (H4)
Pro tip: Most blog themes already style your post title as an H1, so start your post content with H2 headings to maintain proper hierarchy.
Emphasis
Highlight important points with italics and bold:
*This text will be italic*
_This will also be italic_

**This text will be bold**
__This will also be bold__

***Bold and italic together***
Pro tip: Use emphasis sparingly. Too much bold or italic text can actually make your post harder to read.
Lists
Organize information with ordered and unordered lists:
* Unordered list item
* Another item
  * Nested item
  * Another nested item
* Back to the main level

1. Ordered list item
2. Second item
   1. Nested numbered item
   2. Another nested numbered item
3. Back to main sequence
Pro tip: For complex lists, draft them as simple bullet points first, then add hierarchy and numbering during revision.
Links
Connect your content to sources, related articles, and resources:
[Link text](https://www.example.com)

[Link with title](https://www.example.com "Title appears on hover")

[Reference-style link][reference id]

[reference id]: https://www.example.com "Optional Title"
Pro tip: For internal links to other posts on your blog, use relative URLs starting with a slash: [My other post](/blog/other-post-slug).
Images
Make your posts visually engaging:


<!-- For more control with HTML attributes: -->
<img src="https://example.com/image.jpg" alt="Alt text" width="600" height="400">
Pro tip: Create a template with placeholder image syntax that reminds you to add alt text, which is essential for accessibility and SEO.
Blockquotes
Highlight quotes or important notes:
> This is a blockquote.
>
> It can span multiple paragraphs.
>
> > And can be nested.
Pro tip: Use blockquotes to highlight testimonials, pull quotes, or important warnings/notes to readers.
Code
Share code snippets or technical commands:
`inline code` is great for short commands

```
Block code for longer snippets
No language highlighting
```

```javascript
// Code with language-specific syntax highlighting
function helloWorld() {
  console.log("Hello, blogging world!");
}
```
Pro tip: Always specify the language for syntax highlighting. It improves readability and shows attention to detail.
Horizontal Rules
Create visual breaks between sections:
---
or
***
or
___
Pro tip: Use horizontal rules sparingly to avoid breaking the flow of your content too much.
Tables
Present structured data clearly:
| Header 1 | Header 2 | Header 3 |
|----------|----------|----------|
| Cell 1   | Cell 2   | Cell 3   |
| Cell 4   | Cell 5   | Cell 6   |

<!-- For alignment control: -->
| Left-aligned | Center-aligned | Right-aligned |
|:-------------|:-------------:|-------------:|
| Content      | Content       | Content      |
Pro tip: For complex tables, use online Markdown table generators to save time, then paste the result into your post.
Advanced Markdown Techniques for Power Bloggers
Task Lists
Perfect for tutorial posts or tracking progress:
- [x] Write introduction
- [x] Add basic syntax section
- [ ] Complete advanced techniques
- [ ] Proofread post
Footnotes
Add references without disrupting the reading flow:
Here's a statement that needs citation.[^1]

[^1]: This is the footnote content.
Definition Lists
Great for glossary-type content or FAQ sections:
Term
: Definition for the term
: Another definition for the term

Another term
: Definition of another term
Abbreviations
Provide explanations for acronyms:
The HTML specification is maintained by the W3C.

*[HTML]: Hyper Text Markup Language
*[W3C]: World Wide Web Consortium
Custom IDs for Headings
Create anchor links for easy navigation:
## My Section {#custom-id}

[Link to section](#custom-id)
Markdown Workflow Optimizations
Templates for Common Post Types
Create Markdown templates for different post types you frequently write. For example, a review post template might look like:
# [Product Name] Review: [Brief Opinion]

## Quick Verdict
**Pros:**
-
-
-
**Cons:**
-
-
-
## In-Depth Review
### Feature 1
...
### Feature 2
...
## Conclusion
[Call to action]
Keyboard Shortcuts
Most Markdown editors support keyboard shortcuts. Here are some universal ones:
| Action | Windows/Linux | Mac |
|---|---|---|
| Bold | Ctrl+B | Cmd+B |
| Italic | Ctrl+I | Cmd+I |
| Link | Ctrl+K | Cmd+K |
| Heading | Ctrl+H | Cmd+H |
| Code Block | Ctrl+Shift+C | Cmd+Shift+C |
Text Expansion Snippets
Set up text expansion tools to insert commonly used Markdown patterns:
;h1expands to#;h2expands to##;linkexpands to[]();imgexpands to![Alt text]();hrexpands to---
Popular text expansion tools include:
- TextExpander (Mac, Windows)
- Alfred (Mac)
- Espanso (Cross-platform and open-source)
Markdown-Optimized Editors
Use editors designed for Markdown productivity:
- VS Code with extensions:
- Markdown All in One
- Markdown Preview Enhanced
- Paste Image
-
Typora - WYSIWYG Markdown editor that provides a clean writing experience
-
iA Writer - Distraction-free writing with Markdown support
-
Obsidian - Knowledge base that works on plain text Markdown files
-
StackEdit - In-browser Markdown editor with cloud sync
-
Dillinger - Online Markdown editor with live preview
- Notion - All-in-one workspace with Markdown support
Version Control Integration
Use Git to track changes to your blog posts:
# Initialize a repository for your blog
git init

# Add all Markdown files
git add *.md

# Commit changes
git commit -m "Updated blog post on Markdown tips"
Pro tip: Commit your changes with descriptive messages to create a revision history you can refer back to.
Dealing with Markdown Limitations
When to Use HTML
Sometimes Markdown doesn’t offer enough control. Use HTML when you need:
- Complex layouts:
<div class="special-layout"> <div class="column">Content 1</div> <div class="column">Content 2</div> </div> - Advanced image handling:
<figure> <img src="image.jpg" alt="Description" width="600"> <figcaption>This is the image caption</figcaption> </figure> - Interactive elements:
<details>
  <summary>Click to expand</summary>
  This content is hidden by default.
</details>
Extended Markdown Flavors
Different platforms support extensions to basic Markdown:
- GitHub Flavored Markdown:
- Task lists
- Tables
- Strikethrough (
~~text~~) - Autolinked references to issues and users
-
Jekyll/Liquid Extensions: ```liquid
{% highlight python %} def hello_world(): print(“Hello, World!”) {% endhighlight %}
```markdown
3. **Hugo Shortcodes**:
   ```text
   {{< youtube dQw4w9WgXcQ >}}

   {{< figure src="image.jpg" title="Title" >}}
Platform-Specific Markdown Tips
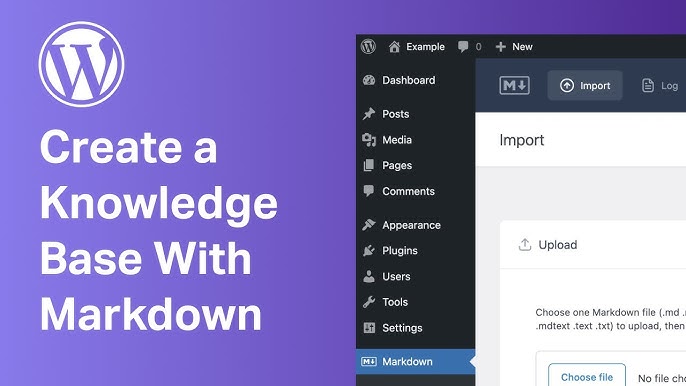
WordPress
If using WordPress with the Gutenberg editor:
- Use Classic Block or Code Block for raw Markdown
- Install plugins like Jetpack or Markdown Block
- Consider using a Markdown-first editor and importing content
Ghost
Ghost supports Markdown natively:
- Use
Ctrl+Shift+Ito insert images - Add cards for embeds and special content
- Use HTML when necessary for custom features
Medium
Medium has limited Markdown support:
- Write in an external Markdown editor
- Import via “Import a story” option
- Adjust formatting after import as needed
Static Site Generators (Jekyll, Hugo, 11ty)
These platforms fully embrace Markdown:
- Store metadata in frontmatter
- Use platform-specific shortcodes for complex elements
- Include raw HTML when necessary
- Set up custom CSS classes for special styling
Time-Saving Markdown Strategies
Write First, Format Later
For maximum productivity:
- Draft your entire post without worrying about formatting
- Go back and add headings, emphasis, and links
- Add images and complex elements last
- Review in preview mode
Use Reference Links for Long-Form Content
For posts with many links, use reference style to keep the main text clean:
This is [an example][id] of reference-style links.

[id]: https://example.com "Optional Title"
Create a Markdown Cheat Sheet
Keep a personal cheat sheet with:
- Your most-used formatting
- Custom patterns specific to your blog
- Snippets for special elements
Consider Automating with Scripts
For repetitive tasks, create scripts:
# Example: Script to create a new blog post with today's date
#!/bin/bash

TITLE=$1
SLUG=$(echo $TITLE | tr '[:upper:]' '[:lower:]' | tr ' ' '-')
DATE=$(date +%Y-%m-%d)
FILENAME="_posts/$DATE-$SLUG.md"

cat > $FILENAME << EOL
---
layout: post
title: "$TITLE"
date: $DATE
categories: []
tags: []
---

## Introduction

## Content

## Conclusion
EOL

echo "Created new post: $FILENAME"
Conclusion
Mastering Markdown is an investment that pays dividends with every blog post you write. By eliminating the friction between thinking and formatting, you’ll find your ideas flowing more freely and your publishing cadence improving.
Start with the basics, gradually incorporate advanced techniques, and soon Markdown will become second nature. Your readers won’t notice the syntax behind your posts—they’ll just appreciate your clear, well-structured, and consistent content that you were able to produce more efficiently.
The beauty of Markdown lies in its simplicity. It gets out of your way so you can focus on what truly matters: sharing your ideas with the world.
What are your favorite Markdown tips or tools? Share in the comments below!